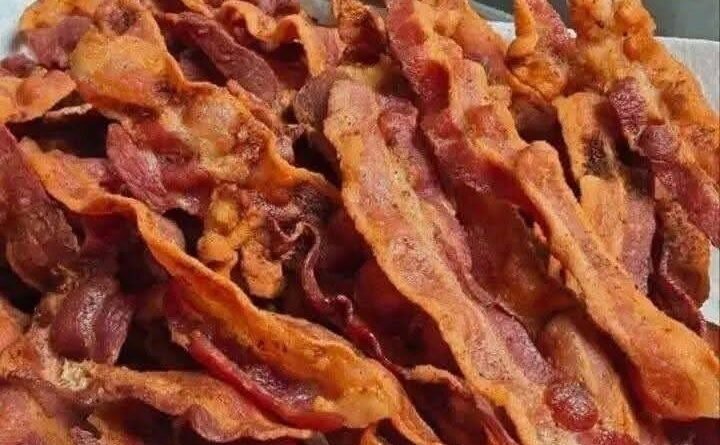
Crispy bacon feels simple, yet so many mornings end with disappointment. Some strips burn at the edges while others stay limp in the center. Grease splatters across the stovetop, pans smoke, and the results feel inconsistent at best. The good news is that perfect bacon is not about luck. It is about method.
Crispy Bacon Like Never Before is all about control. When heat is managed properly, bacon cooks evenly, renders its fat slowly, and turns golden and crisp without scorching. The two methods below remove guesswork entirely. Each has its own strengths, and both deliver reliable, repeatable results that work whether you are cooking for one or feeding a crowd.
I started using these approaches after too many rushed mornings and too many paper towels soaked in grease. Once I switched, bacon stopped being stressful. It became predictable, cleaner, and consistently good. These are the methods I rely on every time.
Method One: The Oven Method for Even, Hands-Off Crispness
Why the Oven Method Works So Well
The oven method is ideal when you want uniform crispness with minimal effort. Instead of direct contact with a hot pan, bacon cooks in steady, surrounding heat. This allows the fat to render slowly and evenly, which is the key to crisp texture without burning.
Because the bacon lies flat, each strip cooks at the same pace. There are no hot spots and no need to flip constantly. Cleanup is also easier, since splatter stays contained on the baking sheet.
This method shines when cooking large batches or when you want your stovetop free for eggs, toast, or coffee.
How to Do the Oven Method Correctly
Preheat the oven to 400°F. Line a rimmed baking sheet with foil for easy cleanup. Place a wire rack on top of the sheet if you want extra crispness, as it allows rendered fat to drip away from the bacon.
Arrange bacon strips in a single layer. Slight overlap is fine because the bacon will shrink as it cooks. Place the tray in the oven and bake until the bacon reaches your preferred level of crispness.
Thin-cut bacon usually takes 12 to 15 minutes. Thick-cut bacon may take 18 to 22 minutes. Check early, especially toward the end, because bacon can go from perfect to overdone quickly.
Once done, transfer the bacon to a paper towel-lined plate to drain briefly before serving.
Method Two: The Cold Pan Start for Balanced, Tender-Crisp Bacon
Why Starting Cold Makes a Difference
The cold pan method is less known but incredibly effective. Instead of placing bacon into a hot pan, you start with a cold skillet and cold bacon. As the pan heats gradually, the fat renders slowly before the meat tightens.
This gradual rendering prevents the bacon from curling aggressively or burning before the fat has melted. The result is bacon that is evenly cooked with crisp edges and a slightly tender center.
This method is especially good when you like bacon that is crisp but not brittle.
How to Use the Cold Pan Method
Lay bacon strips in a cold skillet, making sure they do not overlap. Place the skillet over medium heat and let it warm slowly. Do not rush this step.
As the pan heats, the bacon will begin to release fat. Once sizzling starts, adjust the heat to medium-low. Turn the bacon occasionally to ensure even browning.
Cook until the bacon reaches your desired texture, then remove it to a paper towel-lined plate. Pour off excess fat carefully if continuing to cook additional batches.
This method works best for smaller amounts and gives you more direct control over doneness.
Choosing the Right Bacon for Better Results
Thickness Matters
Thin-cut bacon cooks faster and becomes very crisp but can burn easily if not watched closely. Thick-cut bacon takes longer but offers more room for error and a meatier bite.
Both methods work with either cut, but timing must be adjusted. Thick-cut bacon benefits especially from the oven method, while thin-cut bacon excels in a cold pan when watched carefully.
Quality Makes a Difference
Higher-quality bacon tends to have better fat distribution, which leads to more even cooking. Bacon with large streaks of meat and fat cooks more predictably than uneven slices.
While any bacon can be cooked well with these methods, better bacon rewards you with better texture and flavor.
Common Mistakes That Ruin Bacon
Cooking Too Hot
High heat cooks the outside faster than the fat can render, leading to burnt edges and chewy centers. Both methods above avoid this by controlling temperature from the start.
Overcrowding the Pan
When bacon overlaps heavily, it steams instead of frying. This prevents crispness and causes uneven cooking. Give each strip space whenever possible.
Walking Away Too Long
Even with foolproof methods, bacon still needs attention near the end. Checking early prevents disappointment.
Saving and Using Bacon Fat
Rendered bacon fat is a valuable byproduct. Once cooled slightly, strain it into a heat-safe container and store it in the refrigerator.
It adds incredible flavor to roasted vegetables, fried potatoes, eggs, and beans. A little goes a long way and turns simple dishes into something special.
Which Method Should You Choose
If you are cooking for a group, want minimal mess, or need consistency, the oven method is your best choice. It is reliable, clean, and hands-off.
If you are cooking a smaller batch and enjoy a bit more control over texture, the cold pan method delivers excellent results with minimal equipment.
Both methods remove the frustration from cooking bacon. Once you try them, stovetop guesswork becomes a thing of the past.
Conclusion
Crispy Bacon Like Never Before is not about tricks or shortcuts. It is about understanding how bacon cooks and choosing methods that respect that process. Whether you prefer the ease of perfect oven bacon or the balanced texture of a cold pan start, both approaches deliver golden, evenly cooked strips every time.
With these two foolproof methods, bacon becomes predictable, cleaner, and consistently satisfying. Once you master them, every breakfast feels just a little better.
No Responses Yet